
How to manually change DNS server settings in Windows.
This article will show you how to manually change the DNS settings on your Windows computer.
Manually set the DNS server on Windows
These instructions apply to Windows 7, Windows 8 and Windows 10.
- You will need to login to a Windows user account with administrator privileges. If your user account does not have administrator privileges you may not be able to make DNS changes.
- Click on the Start button to open the Start menu then find and select Control Panel. You can also type Control Panel into the search box in Windows 10 to open it.
- Click Network and Internet and then Network and Sharing Centre.
- Click Change adapter settings in the left-hand column.

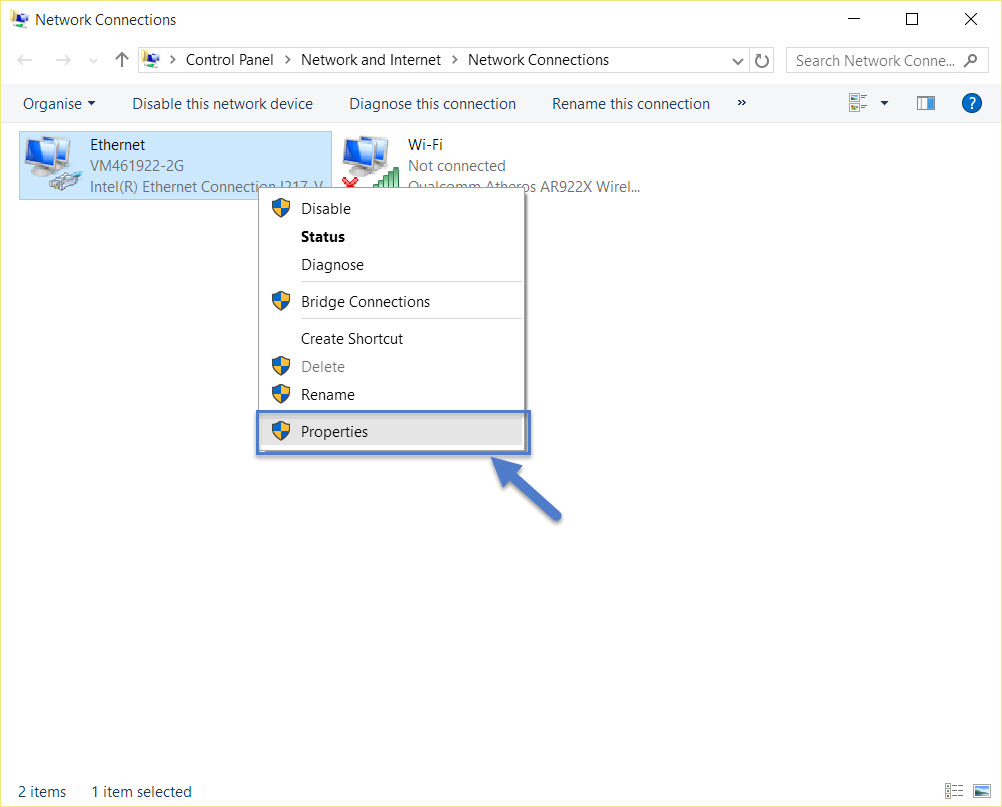
- Right click on the internet connection your are using and select properties. This will either be Ethernet, Wi-Fi or Local Area Connection (Windows 7 and 8).
- Under the Networking tab scroll down to Internet Protocol Version 4 (TCP/IPv4) and double click.

- Under the General tab select Use the following DNS server address:
- Enter the address of the DNS server you want to use. In the image below we are using Google Public DNS which is 8.8.8.8 and 8.8.4.4 but you can enter whatever server you'd like to use.

- Click OK to finish.